User Data
Users service
이제 유저서비스를 다뤄보자.
users.service.ts 파일을 수정하자
1
2
3
4
5
6
7
8
9
10
11
12
13
14
15
16
17
18
19
20
21
22
23
// users.service.ts
import { Injectable } from '@nestjs/common';
import { Repository } from 'typeorm';
import { InjectRepository } from '@nestjs/typeorm';
import { User } from './user.entity';

@Injectable()
export class UsersService {
    // repo : argument name
    // Repository<User> : User type을 다루는 Repository에 접근하여 instance를 받는다.
    // @InjtectRepository(User) : DI 시스템에게 우리가 User Repository가 필요하다는것을 말하는 코드
    // DI 시스템은 뒤에 Repository<User>부분에서 inject할 인스턴스가 무엇인지 파악하기 위해
    // type annotation 한다. generic에는 잘 작동 안하니까 앞에 decorator를 통해 더 분명히 제공한 것.
  constructor(@InjectRepository(User) private repo: Repository<User>) {}

  // create는 service 내에서 받은 정보(email과 password)로 User Entity Instance를 만든다.
  // save는 entity instance를 실제 Database에 저장해준다.
  create(email: string, password: string) {
    const user = this.repo.create({ email, password });

    return this.repo.save(user);
  }
}
이제 컨트롤러에 넣어보자
1
2
3
4
5
6
7
8
9
10
11
12
13
14
15
// users.controller.ts
import { Controller, Post, Body } from '@nestjs/common';
import { CreateUserDto } from './dtos/create-user.dto';
import { UsersService } from './users.service';

@Controller('auth')
export class UsersController {
  constructor(private usersService: UsersService) {}

  @Post('/signup')
  createUser(@Body() body: CreateUserDto) {
    this.usersService.create(body.email, body.password);
  }
}
requests.http 를 통해 테스트해본다. (서버 키고..)
올바른 email과 password를 담아서 보낸 후
설치했던 SQLite 확장 프로그램을 이용해서 데이터를 들여다본다. (컨트롤(맥은 command) + 쉬프트 + P 누르고 sqplite: Open Database 클릭)
db.sqlite 안에 user를 클릭하고 오른쪽에 나타난 재생버튼을 누르면 새로운 창이 뜨면서 내가 입력했던 데이터가 나타난다!
과정 살펴보기
이 데이터가 입력된 프로세스를 이해해보자
1. Request
{ email: ‘junsoopooh@naver.com’, password: ‘19940411’ } 같이 이메일과 암호가 포함된 body가 있는 요청이 들어온다.
2. ValidationPipe
우린 main.ts 파일에 Validation pipe를 설치했다. CreateUserDto를 이용해 body가 올바른지 검사한다.
3. UsersController
route를 정의하고 들어오는 요청에서 데이터를 고른다(현재 경우에는 email과 password). 컨트롤러 자체에는 어떤 비즈니스 로직도 없다.
4. UsersService
컨트롤러가 고른 데이터는 유저서비스에게 전달된다. 여기서 우리 어플리케이션의 실제 logic이 수행된다. 받은 정보를 User entity 인스턴스로 바꾼다. User entity는 User가 무엇인지 정의해준다. User가 email과 password를 속성으로 가진다는 것을 말해준다는 의미이다.
5. UsersRepository
User entity의 인스턴스로 바꾼 후 Repository를 이용해 실제 Database에 저장한다.
User entity instance
user entity instance를 만들지 않고 바로 데이터를 this.repo.save(email, password) 형태로 직접 저장해도 된다. 그럼에도 instance를 만드는 이유는 여러가지가 있는데 그 중 하나가 hook이다.
간단하게 예를 들면,
1
2
3
4
5
6
7
8
9
10
11
12
13
14
15
// user.entity.ts
import { Entity, Column, PrimaryGeneratedColumn } from 'typeorm';

@Entity()
export class User {
  @PrimaryGeneratedColumn()
  id: number;

  @Column()
  email: string;

  @Column()
  password: string;
}
현재 프로젝트의 user entity 파일이다. 여기에 hook decorator를 추가하여 entity가 insert, update, delete 될 때 콘솔창에 id가 출력되도록 코드를 작성할 수 있다. 그렇다면 인스턴스가 추가되거나, 갱신되거나, 삭제될 떄마다 콘솔창에 어떤 id가 적용되었는지 나타난다.
하지만 이 떄 유저 서비스 코드를 수정하여 user entity instance를 넣지 않고 email과 password를 직접 저장하도록 하면? 저장된 내용은 형식만 잘 맞추면 그대로겠지만, 훅이 실행되지 않는다. 유저의 정보를 인스턴스 형태로 다룰 때는 hook이 작동되지만, 직접 넣으면 작동되지 않는다.
훅이 작동하지 않으면 각종 업데이트 확인이나 디버깅에 큰 어려움이 생긴다.
비슷한듯 다른 메서드들
save()VSinsert() or update()remove()VSdelete()
이들의 차이가 바로 여기서 발생한다. 왼쪽은 인스턴스를 이용하기 떄문에 훅이 작동하고, 오른쪽은 그렇지 않다. 때문에 왼쪽을 이용한 것이다. 이는 다른의미로 오른쪽 메서드들은 일반 개체들과 사용된다는 말이기도 하다.(이는 아래 update에 관해서 얘기할 때 다시 나온다..)
직접 코드를 작성해서 확인해보자.
1
2
3
4
5
6
7
8
9
10
11
12
13
14
15
16
17
18
19
20
21
22
23
24
25
26
27
28
29
30
// user.entity.ts
import { AfterInsert, AfterRemove, AfterUpdate, Entity, Column, PrimaryGeneratedColumn } from 'typeorm';

@Entity()
export class User {
  @PrimaryGeneratedColumn()
  id: number;

  @Column()
  email: string;

  @Column()
  password: string;

  @AfterInsert()
  logInsert() {
    console.log('Inserted User with id', this.id)
  }

  @AfterUpdate()
  logUpdate() {
    console.log('Updated User with id', this.id);
  }

  @AfterRemove()
  logRemove() {
    console.log('Removed User with id', this.id);
  }
}
위처럼 hook decorator 코드를 추가하였다. 이제 서버를 실행하고 데이터를 넣어서 콘솔창에 뜨는지 확인해보자
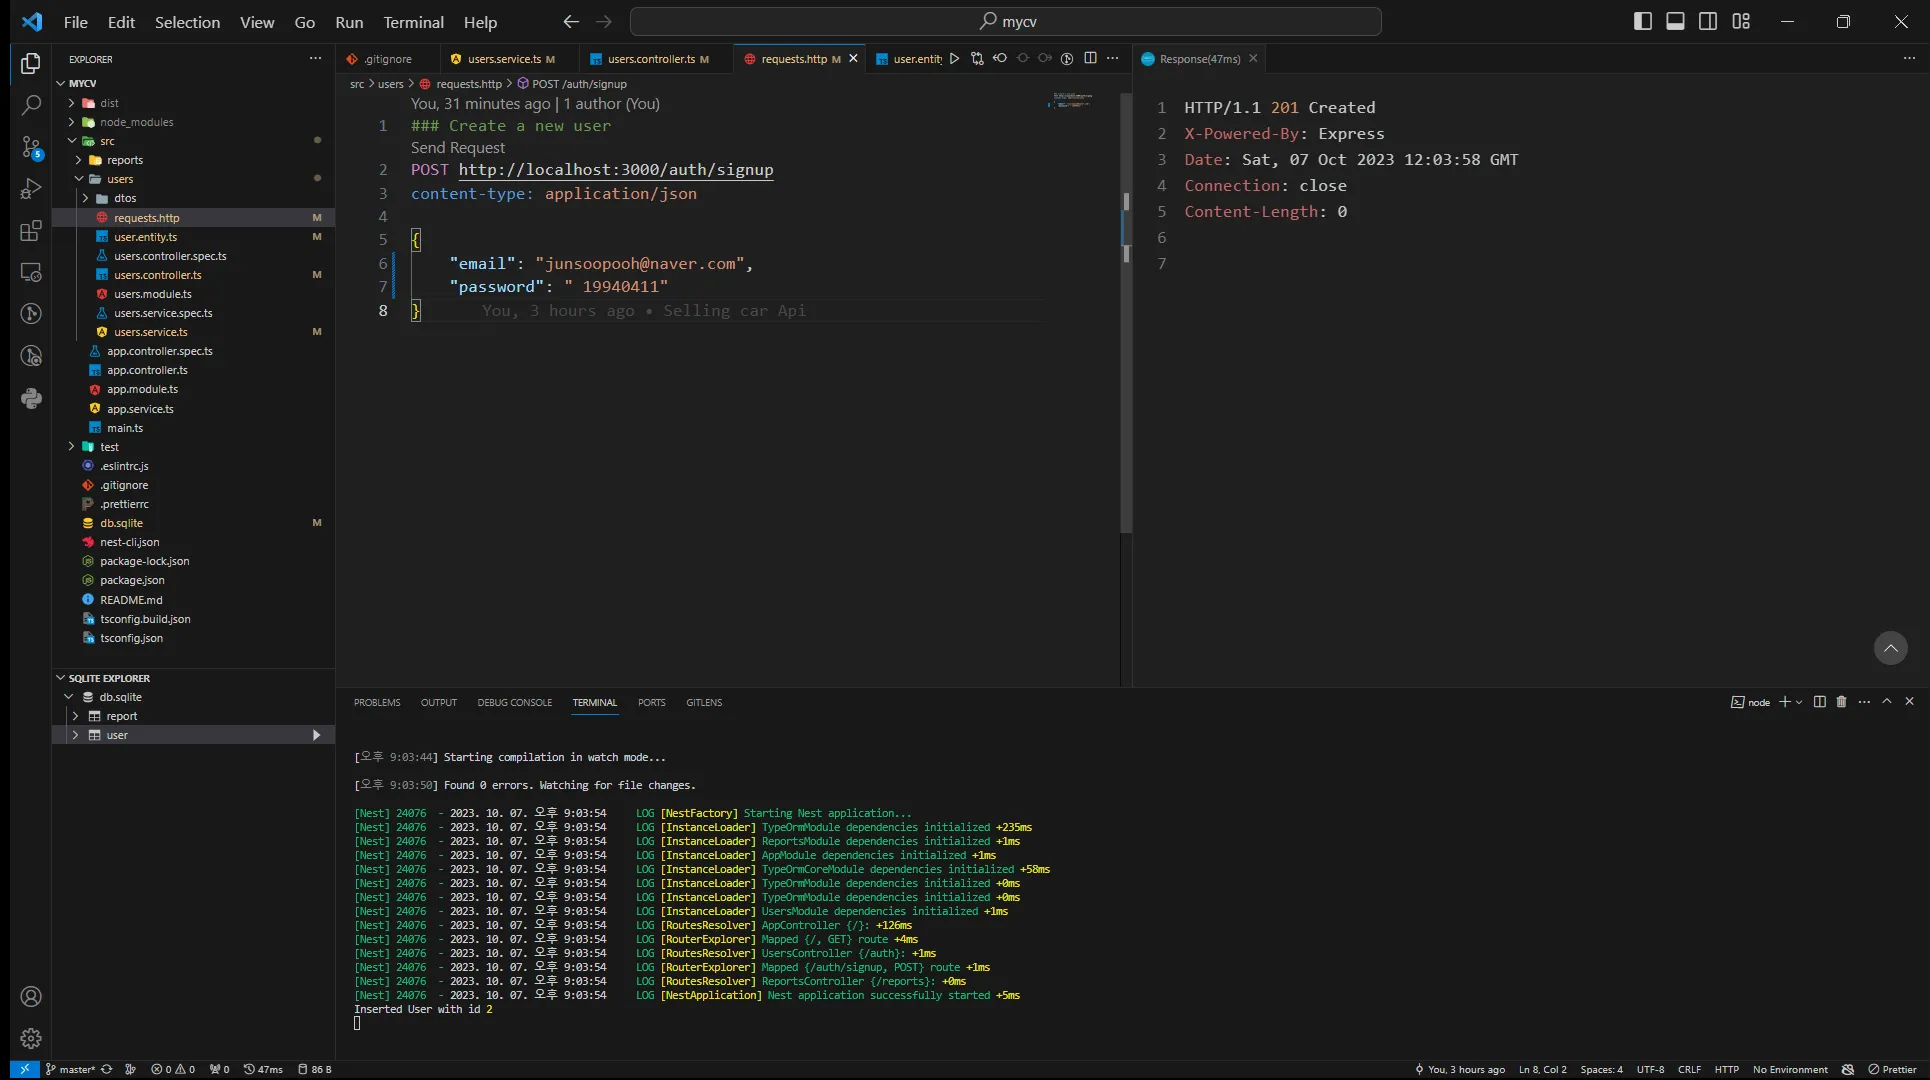
아래 콘솔창에 뜬다.
서비스 코드를 수정하여 인스턴스가 아니라 데이터를 직접 넣도록 해보자
1
2
3
4
5
6
7
8
9
10
11
12
13
14
15
16
import { Injectable } from '@nestjs/common';
import { Repository } from 'typeorm';
import { InjectRepository } from '@nestjs/typeorm';
import { User } from './user.entity';

@Injectable()
export class UsersService {
  constructor(@InjectRepository(User) private repo: Repository<User>) {}

  create(email: string, password: string) {
    const user = this.repo.create({ email, password });

    return this.repo.save(email, password); // 이 부분을 변경했다.
  }
}
이제 다시 요청을 보내고 콘솔창을 확인한다.
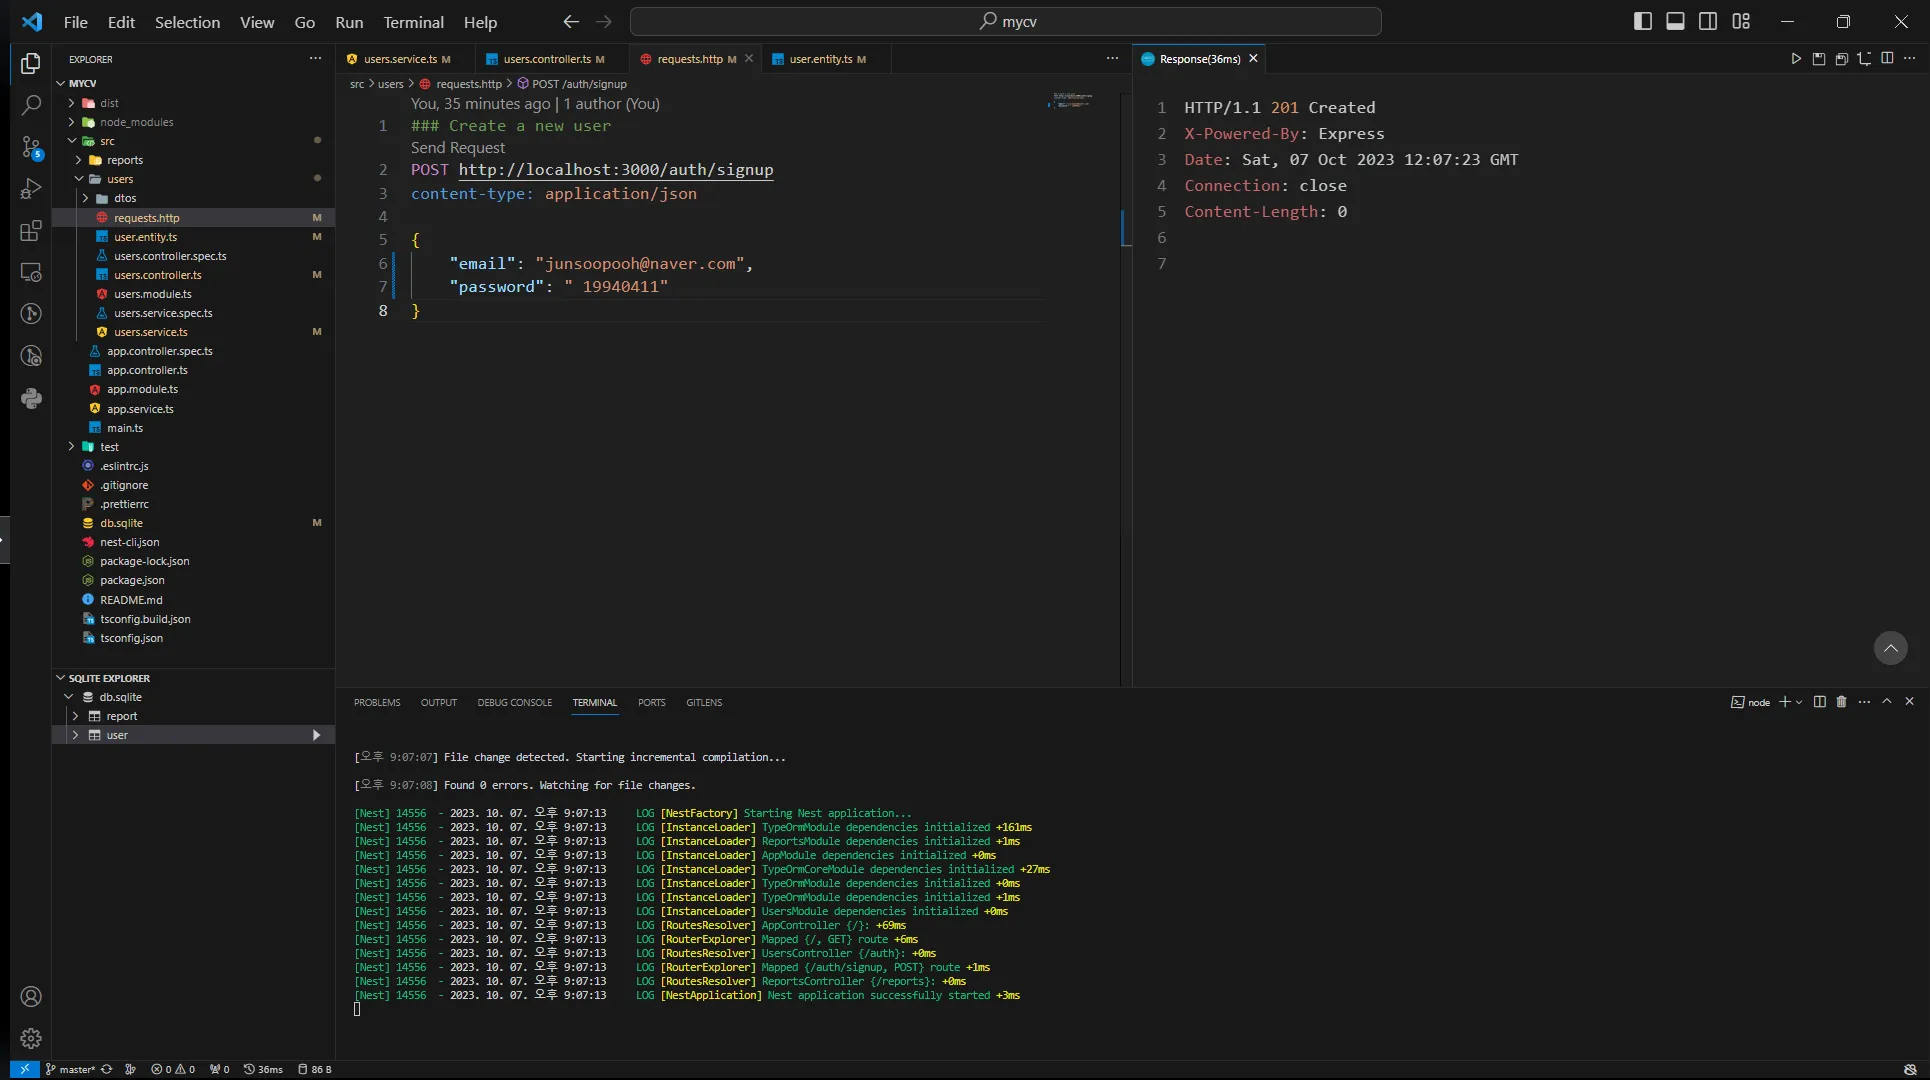
아무것도 뜨지 않는다.
다른 route들 작성하기
생성 메서드를 만들었으니 다른 메서드들도 만들어보자.
우선 유저 서비스에 모든 메서드들을 만들어준다.
우리가 만들것은 findOne, find, update, remove이다.
하나씩 생각해본다. 기능에 대해 생각하고 Repository API로 어떤 인수를 받고 어떤 메서드를 받을지 찾아보며 정하면 된다.
findOne
number로 된 id를 인수로 받을 것이다. Repository API document를 보면, findOne 메서드를 사용하면 된다.
find
email을 받을 것이고, find 메서드를 사용하면 될 것이다.
update
update를 하기 위해 User를 구성하는데 필요한 모든 속성을 다시 받아 새로운 개체로 만들기엔 너무 비효율적이다.
User는 entity에서 정의된 것이기 때문에 email과 password를 개체로 가져야 한다. 만약 업데이트를 이메일만 한다면? 혹은 password만 한다면? 둘 중 하나의 개체만 받았기 때문에 잘못된것으로 받아들일 것이다. 따라서 `attrs: Partial
attrs는 attribute의 악자이다. 이걸 사용하면 속성이 없거나, 하나 이상의 속성이 있거나, 사용자의 모든 속성이 있는 개체를 제공하면 유효한 인수로 간주된다. 따라서 email만, 혹은 password만, 혹은 둘 다 넣어도 모두 유효하게 받아들인다. 그렇다고 없는 개체를 넣어도 되는 것은 아니다. 갑자기 nickname을 넣으면 당연히 유효하지 않게 받아들인다.
다음 문제는 받아들인 인수를 어떻게 찾아 적용할 것인가의 문제이다. id를 가진 데이터를 찾아 적용하고 저장하는 방법에 관한 이야기이다.
위에서 save와 insert, update의 차이에 대해 얘기했었다. 전자는 인스턴스와 사용되고 훅이 작동된다. 후자는 일반 데이터 개체와 사용되고 훅이 작동되지 않는다. update 과정을 인스턴스를 사용하면서 생각해보자. 우선 데이터베이스에서 수정할 데이터를 찾아 가져오고, 해당 인스턴스를 수정한 후, 다시 save해야한다. 데이터베이스와 서버간 데이터 이동이 2번이 생긴다. 인스턴스를 사용하면서 생기는 단점이며, Hook을 사용하기 위해서 치루는 값이라고 생각하자.
일반 데이터 개체(인스턴스가 아니라 email과 password 데이터를 직접 다룬다는 의미이다.)는 그냥 삽입(insert)하여 업데이트하면 된다. DB 접근이 딱 1번만 일어나는 것이다.
우리는 인스턴스를 사용하기 때문에 findOne으로 id에 맞는 유저를 찾아 수정할 데이터를 덮어써주고, 저장해야 한다.
remove
위에서 봤듯이 remove와 delete가 있다. update에서 본 것처럼 remove는 Entity instance를, delete는 id를 다룬다. delete는 인수 찾은 모든 유저를 삭제한다.
remove는 데이터베이스에 한 번 접근할 것 같지만 update에서 처럼 두 번 왕복한다. 찾아서 가져오면서 한 번, 실제로 삭제할 떄 한 번.
완성된 유저 서비스 코드를 보자
1
2
3
4
5
6
7
8
9
10
11
12
13
14
15
16
17
18
19
20
21
22
23
24
25
26
27
28
29
30
31
32
33
34
35
36
37
38
39
40
41
42
// users.service.ts
import { Injectable } from '@nestjs/common';
import { Repository } from 'typeorm';
import { InjectRepository } from '@nestjs/typeorm';
import { User } from './user.entity';

@Injectable()
export class UsersService {
  constructor(@InjectRepository(User) private repo: Repository<User>) {}

  create(email: string, password: string) {
    const user = this.repo.create({ email, password });

    return this.repo.save(user);
  }

  findOne(id: number) {
    return this.repo.findOneBy({ id });
  }

  find(email: string) {
    return this.repo.find({ where: { email } });
  }

  async update(id: number, attrs: Partial<User>) {
    const user = await this.findOne(id);
    if (!user) {
      throw new Error('user not found');
    }
    Object.assign(user, attrs);
    return this.repo.save(user);
  }

  async remove(id: number) {
    const user = await this.findOne(id);
    if (!user) {
      throw new Error('user not found');
    }
    return this.repo.remove(user);
  }
}
컨트롤러에 메서드 추가하기
서비스를 완성하였으니 컨트롤러에 다음 메서드 하나를 우선 추가하자.
ID로 유저 탐색
1
2
3
4
5
// id는 url에서 숫자로 전달되는 듯 보이지만 실제로는 문자열이다. 즉, 문자열로 가져와 숫자로 전달해야 한다.
  @Get('/:id')
  findUser(@Param('id') id: string) {
    return this.usersService.findOne(parseInt(id));
  }
requests.http 에 새로운 테스트 코드를 추가하여 확인해보자.
1
2
### Find a particular user with a given ID
GET http://localhost:3000/auth/1
테스트가 잘 실행되면 다른 메서드들도 추가하자.
모든 유저 탐색
1
2
3
4
@Get()
  findAllUsers(@Query('email') email: string) {
    return this.usersService.find(email);
  }
1
2
### Find all users with a given email
GET http://localhost:3000/auth?email=junsoopooh@naver.com
id로 유저 삭제
1
2
3
4
 @Delete('/:id')
  removeUser(@Param('id') id: string) {
    return this.usersService.remove(parseInt(id));
  }
1
2
### Delete a user given id
Delete http://localhost:3000/auth/1
업데이트
기존 DTO는 User entity가 가진 속성을 가지고 있는지 확인했다. 업데이트 떄는
1) email만 2) password만 3) 둘 다
받을 수도 있다. create와 다르게 세가지 모든 경우에 validation이 통과되야 한다. 따라서 새로운 DTO를 만들어야 한다.
업데이트를 위한 새로운 DTO
users 디렉토리의 dtos 폴더안에 새로운 파일 update-user.dto.ts를 만들자
1
2
3
4
5
6
7
8
9
10
11
12
13
// update-user.dto.ts
import { IsEmail, IsString, IsOptional } from 'class-validator';

export class UpdateUserDto {
  @IsEmail()
  @IsOptional()
  email: string;

  @IsString()
  @IsOptional()
  password: string;
}
@IsOptional() decorator는 해당 속성을 선택사항으로 만들어준다.
컨트롤러로 돌아가 새로운 DTO를 적용하자.
1
2
3
4
5
6
import { UpdateUserDto } from './dtos/update-user.dto';

@Patch('/:id')
  updateUser(@Param('id') id: string, @Body() body: UpdateUserDto) {
    return this.usersService.update(parseInt(id), body);
  }
테스트 코드도 추가하고 확인하자.
1
2
3
4
5
6
7
### Update a user
PATCH http://localhost:3000/auth/signup
content-type: application/json

{
    "email": "junsoopooh@gmail.com"
}
오류와 예외 처리에 관하여
현재 코드처럼 일반적인 Error(우리가 정한 에러문 같은)를 throw해선 안된다. Nest가 정보를 알아낼 수 없기 때문이다.not found, bad request같은 예외처리(Exception)을 해야하는데, 그렇다고 users service에서 exception 처리하면 끝나는 문제가 아니다.
유저 서비스는 컨트롤러가 받게 되는데, 컨트롤러는 HTTP 뿐만 아니라 WebSocket이나 GRPC와도 통신한다. WebSocket, GRPC와 소통하는 UsersController는 UsersService가 내보내는 NotFoundException을 어떻게 처리해야하는 지 모른다.
쉽게 말해, HTTP에 한정된 에러를 UsersService에서 던지도록 만들면 나중에 다른 통신 프로토콜에서 서비스를 재사용하는 과정에서 문제가 발생할 수 있다.
물론 현재 단계에선 신경 안쓰고 NotFoundException 써도 된다. Websocket 쓸일 없으니까.. 다만 알고는 있자!
현재 서비스 내의 throw error 구문을 모두 바꿔주자.
1
2
3
4
5
6
7
8
9
10
11
12
13
14
15
16
17
18
19
20
21
22
23
24
25
26
27
28
29
30
31
32
33
34
35
36
37
38
39
40
41
42
// users.service.ts
import { Injectable, NotFoundException } from '@nestjs/common';
import { Repository } from 'typeorm';
import { InjectRepository } from '@nestjs/typeorm';
import { User } from './user.entity';

@Injectable()
export class UsersService {
  constructor(@InjectRepository(User) private repo: Repository<User>) {}

  create(email: string, password: string) {
    const user = this.repo.create({ email, password });

    return this.repo.save(user);
  }

  findOne(id: number) {
    return this.repo.findOneBy({ id });
  }

  find(email: string) {
    return this.repo.find({ where: { email } });
  }

  async update(id: number, attrs: Partial<User>) {
    const user = await this.findOne(id);
    if (!user) {
      throw new NotFoundException('user not found');
    }
    Object.assign(user, attrs);
    return this.repo.save(user);
  }

  async remove(id: number) {
    const user = await this.findOne(id);
    if (!user) {
      throw new NotFoundException('user not found');
    }
    return this.repo.remove(user);
  }
}
findOne에서 발견하지 못했을 때 NotFoundException 처리하는 것은 controller 메서드에 추가해주자. 서비스에 해도 아무 상관없다.
1
2
3
4
5
6
7
8
9
// users.controller.ts
@Get('/:id')
  async findUser(@Param('id') id: string) {
    const user = await this.usersService.findOne(parseInt(id));
    if ( !user) {
        throw new NotFoundException('user not fond');
    }
    return user;
  }